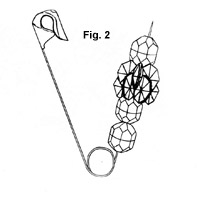
1. Refer to Figure 2, and, after opening the pin, slip on 2 8mm beads, then 2 starflake beads and a final 8mm bead. Snap the pin closed. Repeat this on all of the remaining safety pins. We shall refer to this as a safety pin assembly or assembly from this point on.
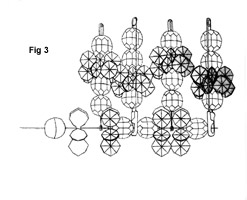
2. Take one of the pieces of 20-gauge wire and *string 1 pin assembly by the head (the large end), add an 8mm bead, 1 starflake bead, 1 pin assembly by the hinge - notice that this faces the opposite direction - 1 starflake and another 8mm bead. Repeat from * until you have used all the safety pins, ending with a starflake and an 8mm bead (See Figure 3). Twist the wire together as close to the beads as possible and as tightly as you possibly can. You are now ready for the next step.
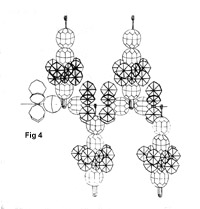
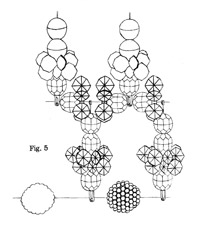
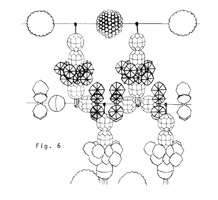
3. Look carefully at Figure 4 and note how you will now separate the pins by turning the hinge ends which are still loose to the top and the large heads to the bottom. All of your pin assemblies are now facing in one direction - out. Cut the remaining piece of wire into 2 pieces. You will use one piece for the top of the candlero and the other for the bottom. Let's work on the bottom piece first. Refer to Figure 5 and begin stringing a berry bead between the heads of each pin assembly on the bottom now. Twist the ends together as tightly as possible, as closely to the beads as possible, being careful not to break the wire.
4. Refer now to Figure 6 and add a berry bead between each hinged end of the pin assembly, using the last piece of wire. Remember, the drawings show the beads loosely threaded; in tightening down the top and bottom wires, you will get the pulled-in shape. Refer to Figure 1 and slip the votive candle holder in place in the safety pin holder BEFORE YOU TIGHTEN THE TOP WIRE DOWN. Then tighten and clip off excess wire.
5. Fold the wire twists to the inside, where they will be invisible.