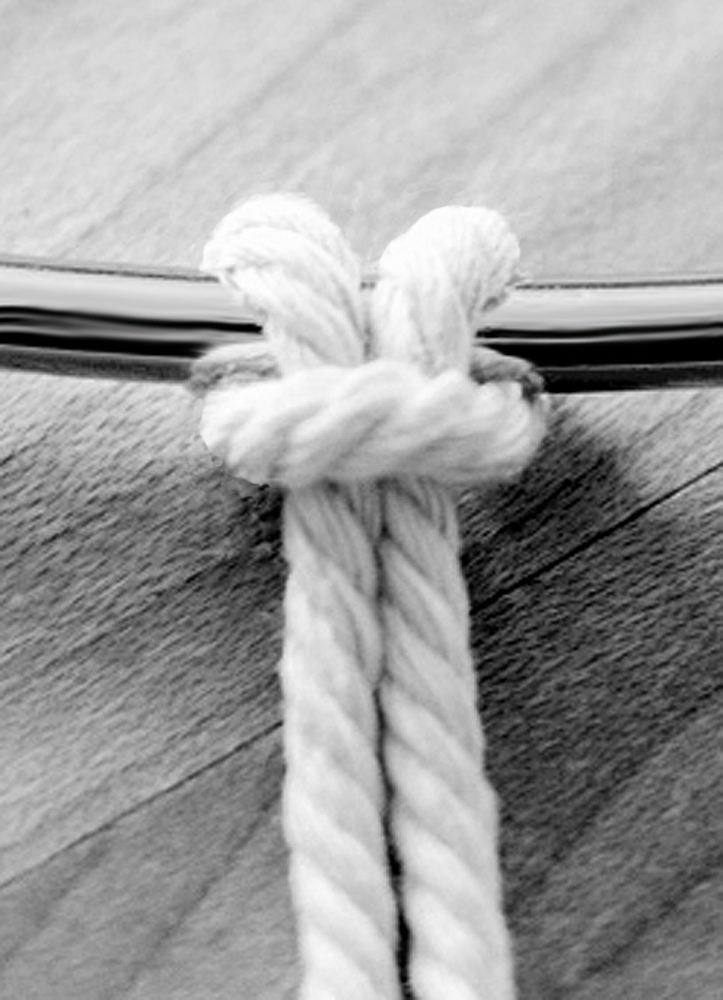
1. Locate the halfway point of your cord or lacing and fold it in half. Attach the folded cord to your key ring or lanyard hook using a lark's head knot as shown in the photo. You should now have two cords hanging from the key ring.
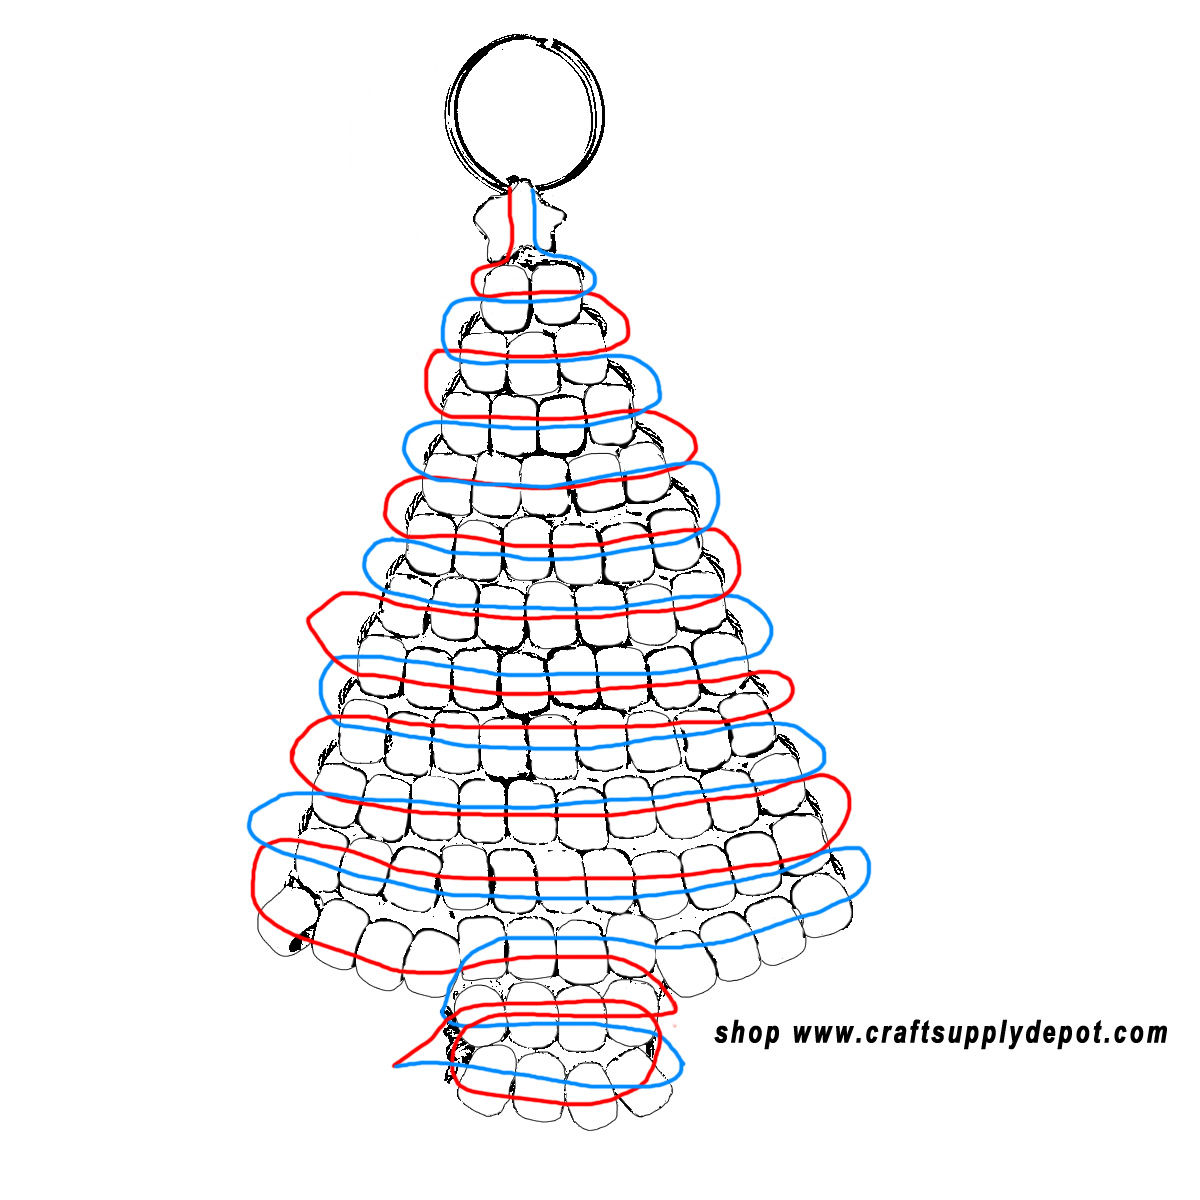
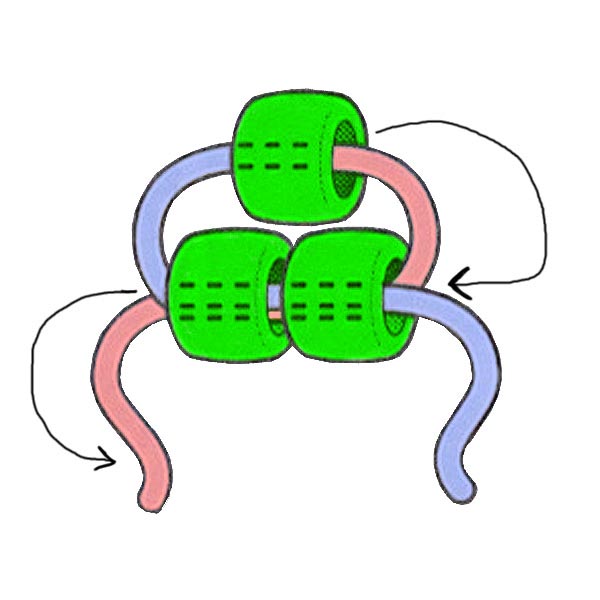 2. Using the bead diagram for the Christmas tree keychain located at the bottom of these instructions as your guide, begin weaving the rows of beads one row at a time, starting at the top of the tree with the star bead. To begin, thread both cords through the star and then pass both cords through each row of beads from opposite directions as shown in the illustration to the right. Pull both cords gently and evenly so that the beads rest snugly against the previous row.
3. Continue working downward through the Christmas tree pattern, carefully following the cord paths shown in the diagram. As you add each row, gently pull the cords snug and check that the beads are lying neatly in place. Maintaining even tension throughout the project will help your finished tree keep its shape.
4. Continue adding the colorful ornament beads, green tree beads, and gold glitter beads as shown in the diagram. Feel free to substitute different ornament colors to create your own unique holiday tree.
5. When you finish threading through the final row, thread one of the cords back through the previous row so that both cord ends end up on the same side and next to each other. Tie the cords together securely using a surgeon's knot or a double knot. Apply a small drop of glue to the knot to prevent unraveling. Trim the excess cord after the glue has dried.
Your beaded Christmas tree keychain is now complete and ready to decorate your keys, backpack, purse, gift package, or holiday tree!
The illustration below uses red and blue to show you how each side of your cord is woven through the beads. It opens to a larger image if you click it.
Make It Your Own
Have fun decorating your Christmas tree with different bead colors and finishes. Try using pearl, glitter, metallic, translucent, or glow-in-the-dark pony beads to create your own unique holiday tree. You can also change the ornament colors to match your holiday decorating theme or make several trees in different color combinations for gifts and decorations.
Did You Know?
Decorating evergreen trees during winter celebrations dates back hundreds of years. Early Christmas trees were often decorated with handmade ornaments, candles, fruit, nuts, and other small treasures long before modern ornaments became popular.


 52 - Green Pony Beads
 12 - Assorted Transparent Pony Beads
 8 - Gold Glitter Pony Beads
 1 - Star Pony Bead
 1 - Key Ring
 5 feet
 Scissors