Buy Craft Supplies - Craft Supplies Online - Craft Supplies
Quality Craft Supplies Ranging From the Usual to the Not So Usual, Delivered To Your Door
Excellent Customer Service - Fast Shipping - Online since 1994!

In business since 1985. Online since 1994. We sincerely thank you for supporting family owned, family operated businesses!
Member of Better Business Bureau with an A+ rating.

Give us a call from 8am to 6pm Mon-Fri. We are available to answer questions or to take your order.
(361) 645-3325

 Beaded Bell Ornament

DIY bell ornament craft with pony beads - free beaded bell pattern and instructions
 

Make Your Own Beaded Bell Ornaments and Decorations

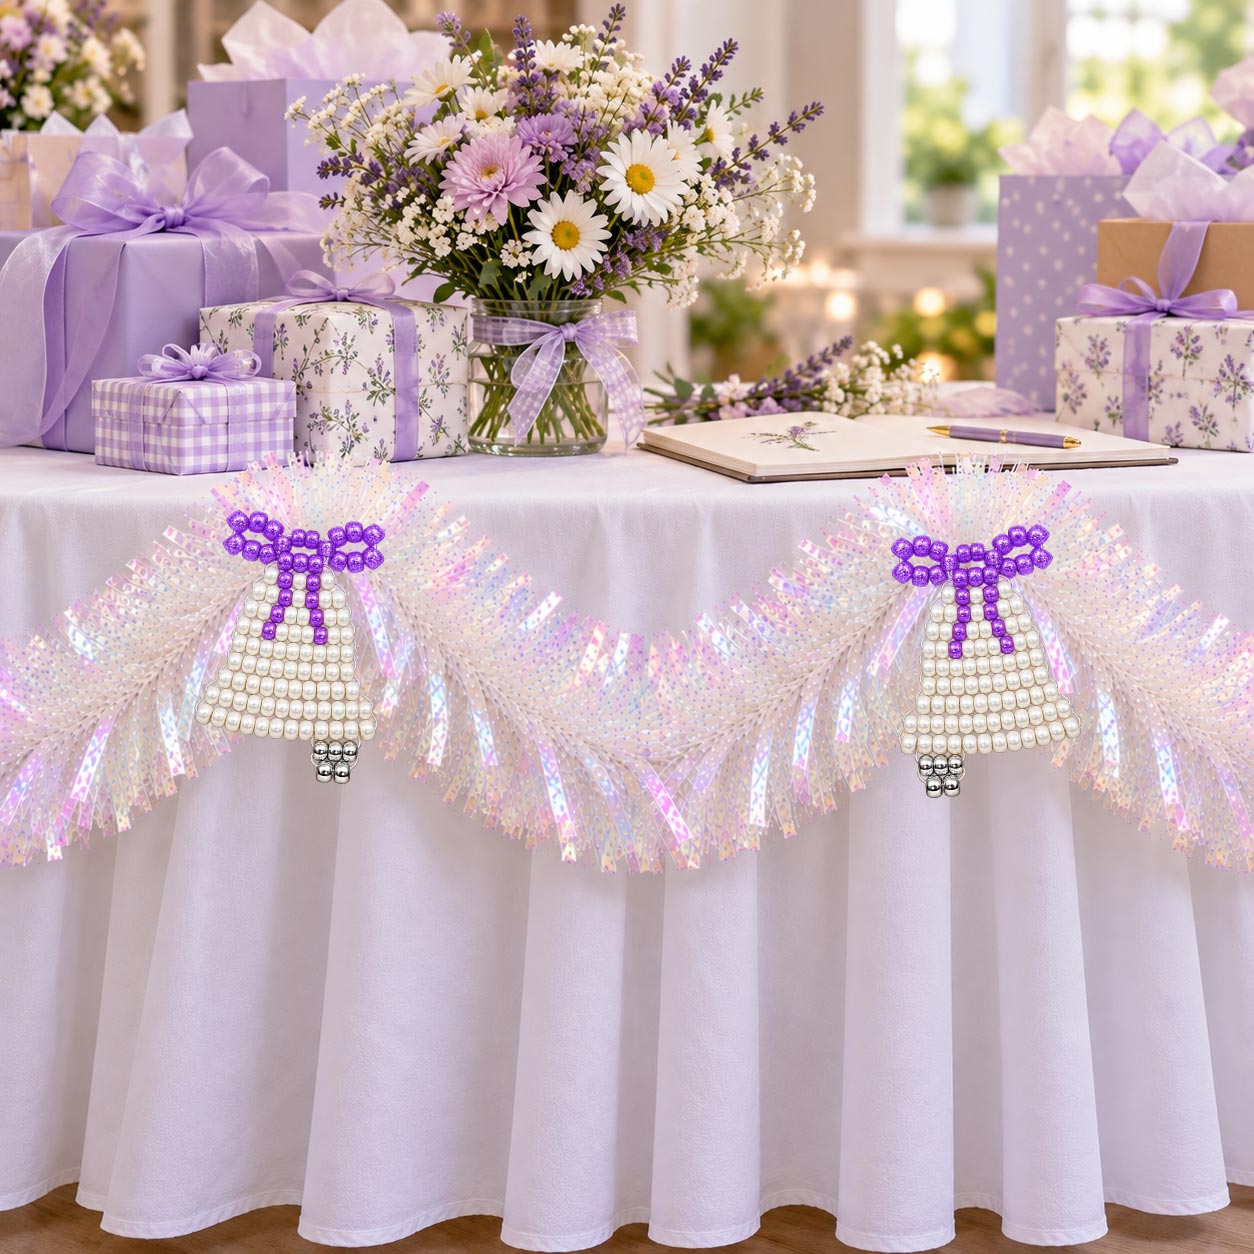
Bells make such pretty decorations! Depending on the colors you use they can dress up for Christmas, a wedding, or a shower or party.

I think one of the nicest things about making these little pony bead bells is that by changing their color, using metallic finishes, glitter beads, pearl finishes, or an entirely different combination for the bow and bell transforms them to work for any occasion.

These diy beaded bell ornaments can be hung on Christmas trees, added to wreaths and garlands, or used to decorate packages and gift baskets. They would also be lovely dangling along the edge of a gift table at a bridal shower, tied to party favors, or if using translucent colors it becomes a sun catcher hanging in a sunny window. These pony bead bells would be fun to make for so many occasions, and once you start thinking about places to use them, you may find yourself wanting to make more!

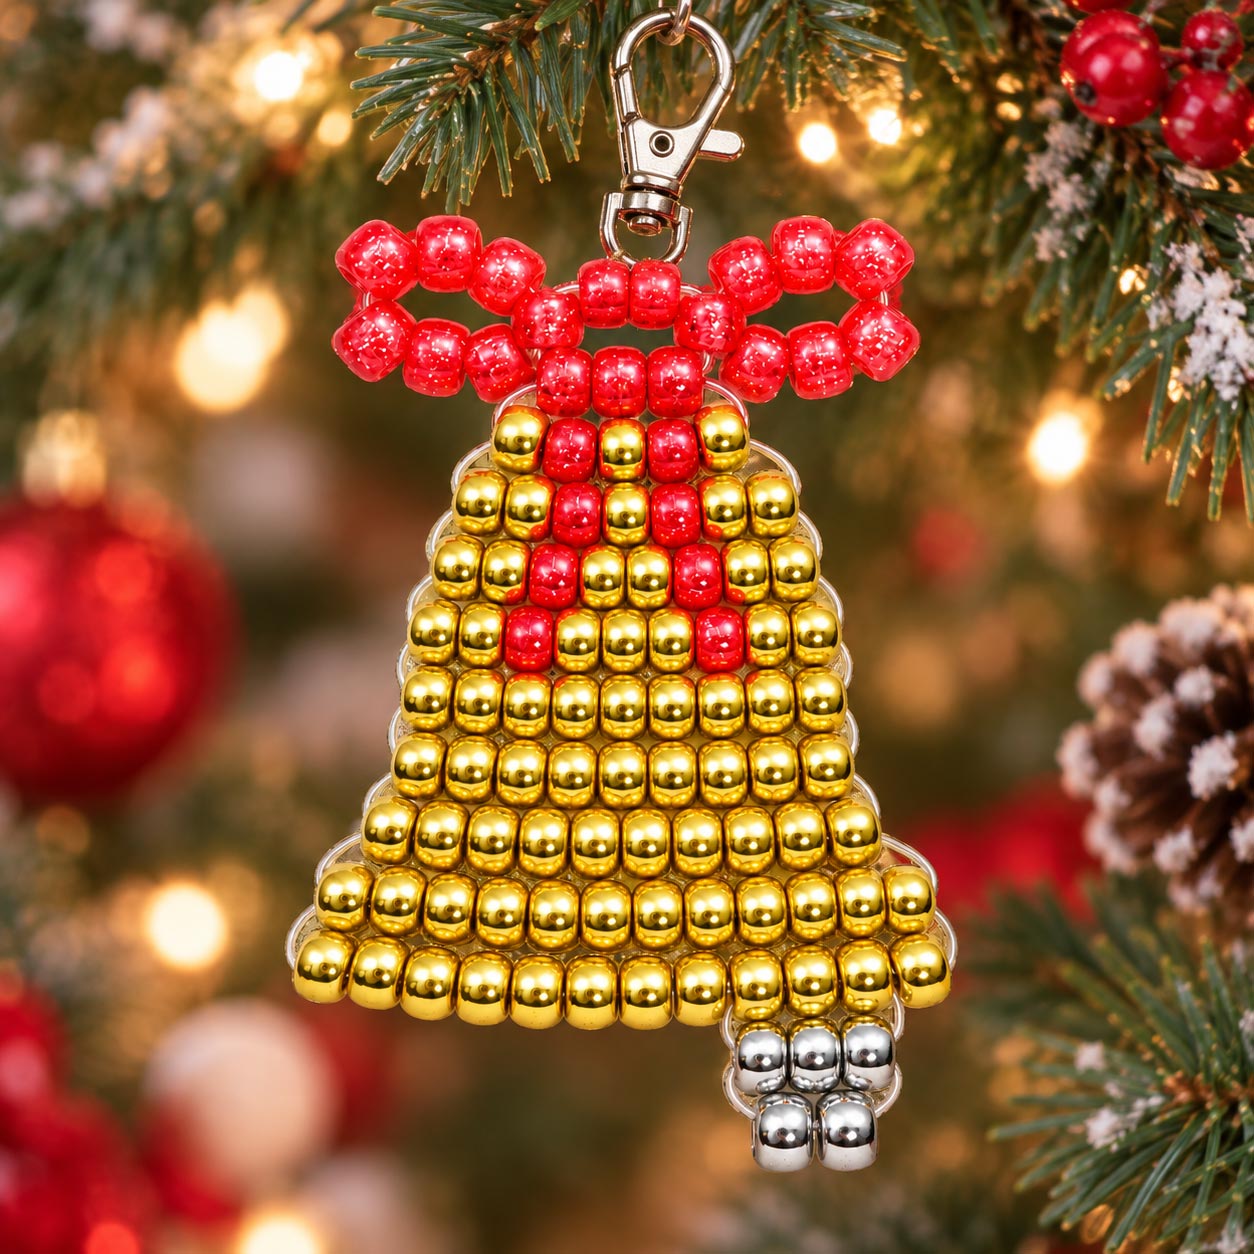
Our free pony bead bell pattern shows you how to make the bell, including its decorative bow and little clapper at the bottom. The same pattern can be used with different bead colors and finishes, so you can make a collection of bells for different holidays, parties and celebrations.

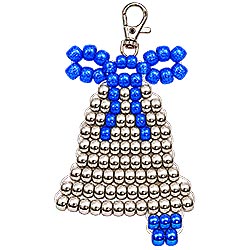
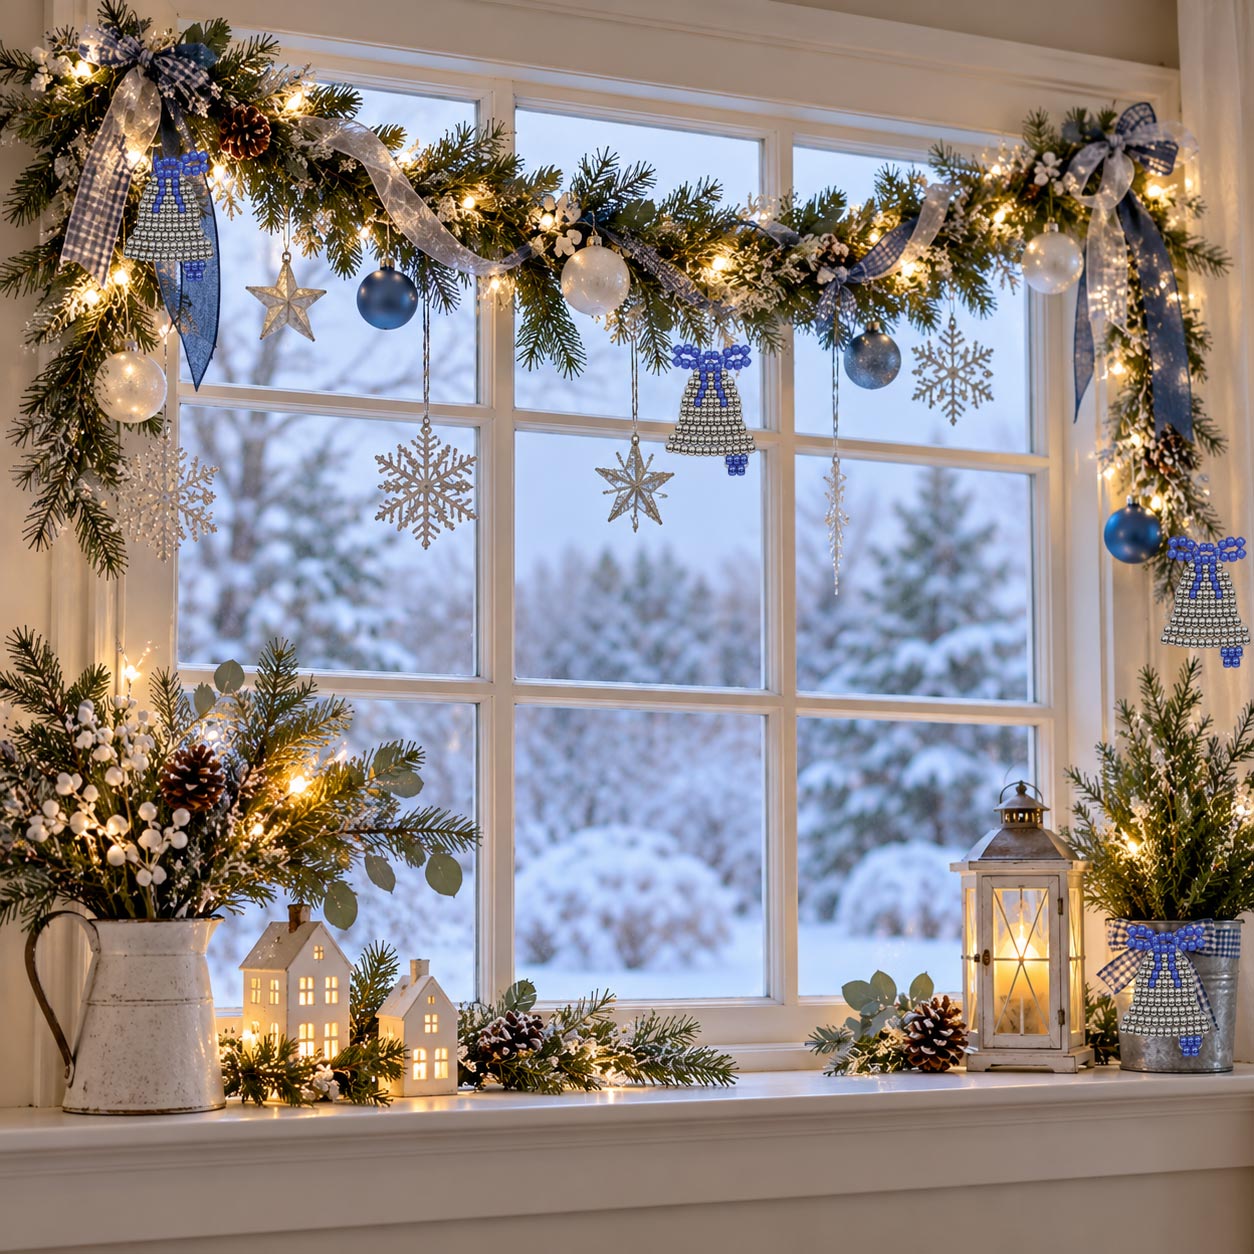
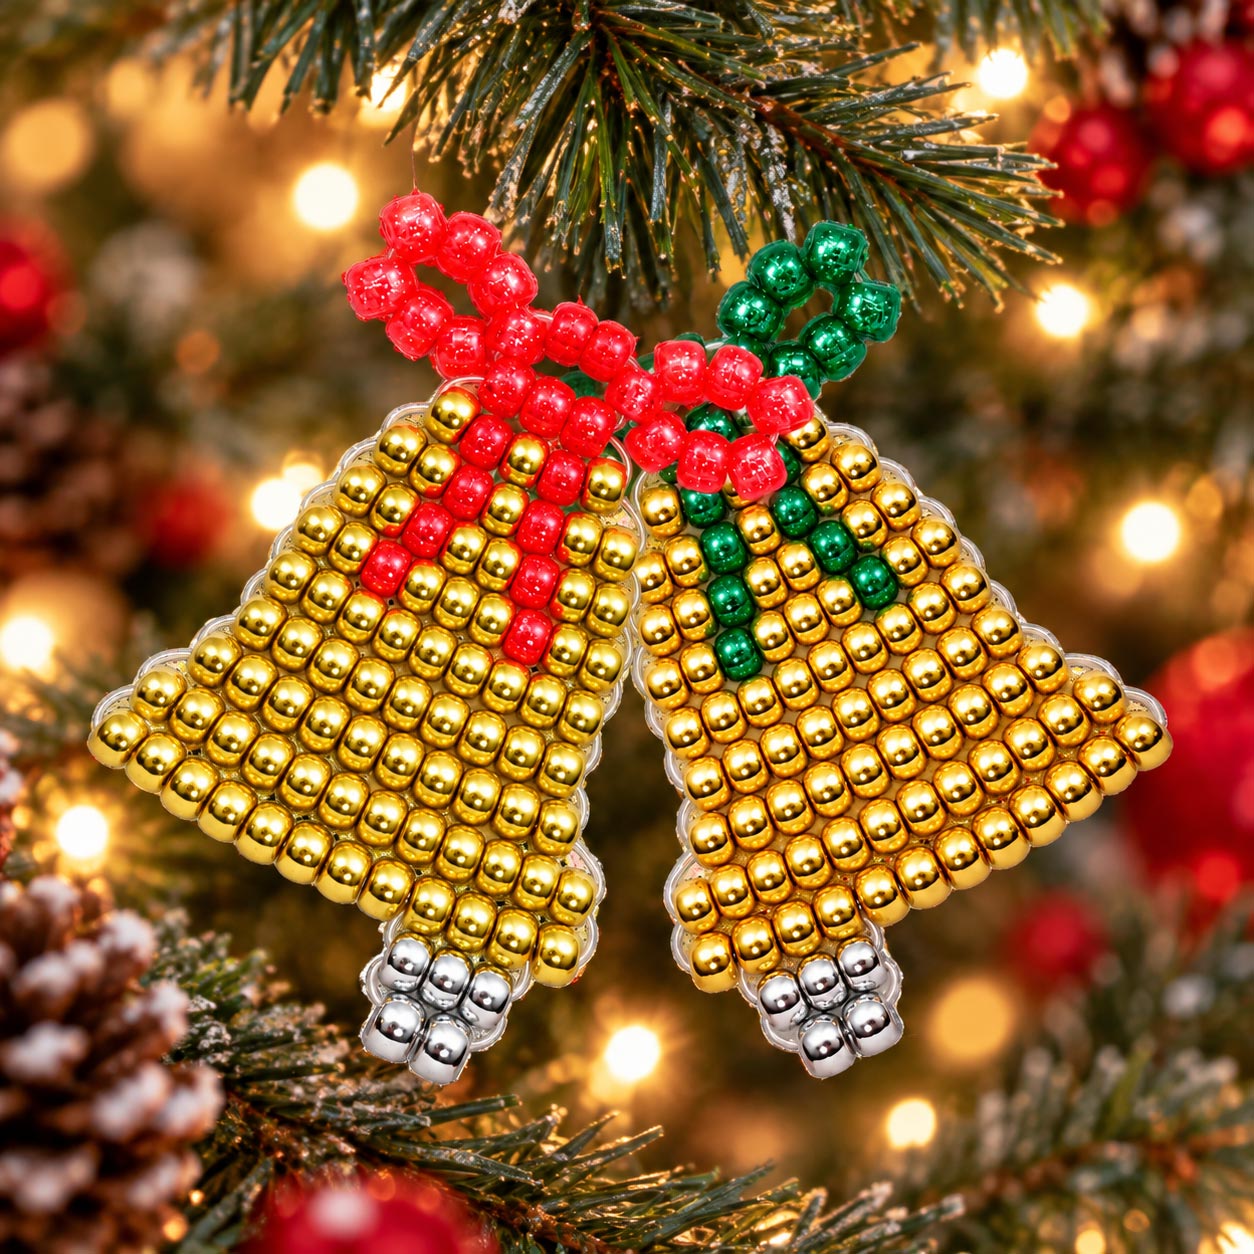
Christmas ornaments with pony beads - DIY bell ornament craft Beaded pony bead DIY Christmas ornament hanging on a decorated Christmas tree DIY Christmas bell ornament pattern and pony bead Christmas decorations DIY Bell ornament Craft Instructions and Pattern

Note: you can see more detail by clicking on the image.

If you make this project please share your photos with us. If we use them on our website or on Facebook you will get 10% off of your next order over $25!

Note: For your convenience and to assist you in being able to locate the material required for this project, all of the materials listed may be linked to other websites or contain affiliate links. All will open into a new window so that you don't lose this pattern page.
~ ~ ~ ~
Materials Needed:
    • Lanyard hook for attaching a pony bead bell ornament or decoration. 1 - Lanyard Hook OR Key ring connector for a DIY pony bead bell ornament craft. 1 - Key Ring

      The lanyard or keyring are just a standard recommendation. If you are making an ornament out of this pattern you might want to use a decorative ornament hook instead, or even a jump ring and decide how to connect it later.

    • Cord - Approximately 2 yards

      There are lots of different types of cord you can use for your beaded Mrs. Claus. Of all the different kinds of cords we've tried, a flat plastic lacing such as Rexlace (also called boondoggle or plastic lace) seems to work best on all of these types of patterns. It just seems to help the rows of beads sit neatly together without bunching or curling as easily and keeps your finished ornament shape better. Round cords, about 1 1/2mm to 2mm thick also works well and there is a plastic cord out there called pony bead cord that is supposed to be good but I haven't tried it so I can't say from experience. If all you have is a thinner cord, you can weave a little wire or a pipe cleaner into your ornament for extra stiffness.

      Helpful Hint: If your cord end frays easily, try dipping it into a little melted wax and smoothing it out with your fingers. This helps prevent fraying and creates a stiffer end for threading through your beads.

      Monofilament cord for making a DIY pony bead bell ornament. Monofilament Cord OR Metallic cord for weaving a beaded bell ornament craft. 2mm Metallic Cord
    • Pony beads for the main body of a DIY bell ornament pattern. 73 - Pony Beads (Main bell color.)
    • Glitter pony beads for the clapper of a beaded bell ornament craft. 5 - Pony Beads (Clapper color.)
    • Pony beads for the decorative bow on a DIY bell ornament. 27 - Pony Beads (Bow color.)
    • Glue for securing the finishing knots of a pony bead bell ornament. Glue
    • Scissors for cutting cord when making a pony bead bell craft. Scissors
    • Ruler or measuring tape for a DIY pony bead bell ornament pattern. Ruler or Measuring Tape
    • Optional: For a stiffer beaded bell, you can include a piece of pipe cleaner or wire through one of the wider rows to help it keep its shape.

      Beading wire for helping a pony bead bell ornament hold its shape. Beading Wire OR Pipe cleaners to help your DIY beaded bell ornament craft hold it's shape, if needed. Pipe Cleaners

Instructions:

Lark's head knot for starting a DIY pony bead bell ornament.1. Locate the halfway point of your cord or lacing and fold it in half. Attach the folded cord to your key ring, lanyard hook or other connector using a lark's head knot as shown in the photo. You should now have two cords hanging from your connector.

Note:Omit the previous step if you are using a different type of connector for your ornament. You will still want to fold your cord in half so you have two even lengths to begin weaving your beads.
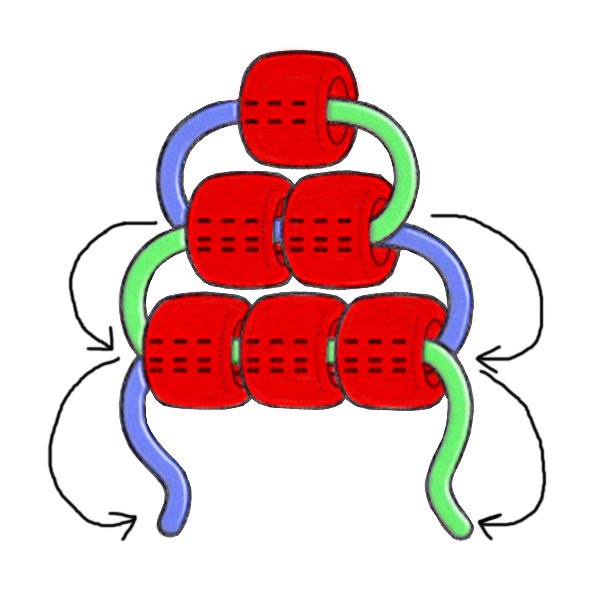
Illustration showing how to weave rows for a pony bead bell ornament pattern.2. Using the beaded bell diagram at the bottom of these instructions as your guide, begin weaving the rows of beads from the top of the bell. Thread the beads for the first row onto one cord, then pass the other cord back through those same beads from the opposite direction, as shown in the illustration. Pull both cords until the beads sit neatly together.

Note: The tension of your cord does make a difference. The rows should sit snugly together without being pulled so tightly that your bell begins to curl or twist. If a row doesn't sit straight just loosen it, straighten the beads and pull the slack out again.

3. Continue working downward through the bell pattern, following the bead colors and cord paths in the diagram. The pattern includes the decorative bow at the top, the bell itself and the little clapper at the bottom.

4. As you already know, you can use different bead colors or finishes for the bow, bell and clapper. What you might not think about is how glitter, pearl, translucent and metallic finishes can change your bell's appearance substantially. Pairing the right colors can change a pretty diy Christmas ornament into a softly colored wedding or shower decoration. And changing to different colors for your bell could also be the perfect pop needed in your wreath.

Note: If your finished bell doesn't hold it's shape well you can weave a piece of pipe cleaner or wire through one of the widest rows to help it hold its shape.

5. I always try to make my tie-off knots as inconspicuous as possible. Sometimes that means doing a little extra weaving, so here are two ways to finish your beaded bell. You can decide which one you prefer:

  • Tie off at the sides (two knots): Tie off each cord where it exits on either side of the ornament. Secure each knot with a small drop of glue.
  • Tie off on one side (one knot): When you finish threading through the final row, thread one of the cords back through the previous row so that both cord ends end up on the same side of your project and next to each other. Tie the cords together securely using a surgeon's knot or a double knot. Apply a small drop of glue to the knot to prevent unraveling.

Trim the excess cord after the glue has dried.

Your beaded bell is now complete! You can hang it on a Christmas tree, add it to a wreath or garland, decorate a gift package or use it as part of your party decorations.

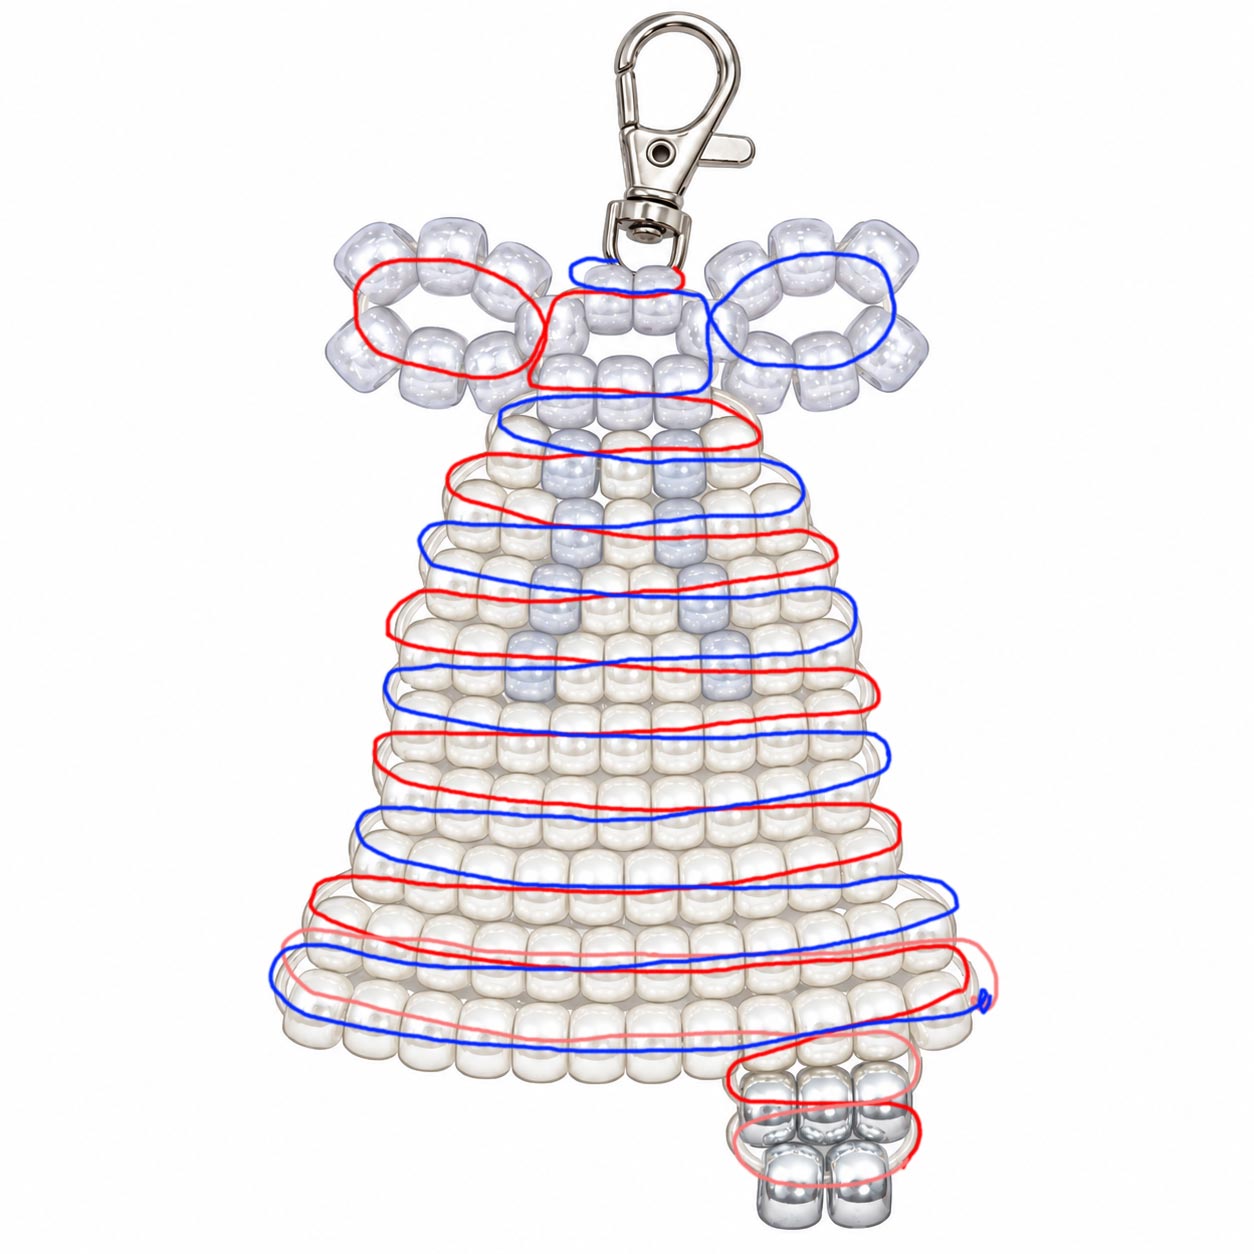
The illustration below uses red and blue to show you how each side of your cord is woven through the beads. It opens to a larger image if you click it.
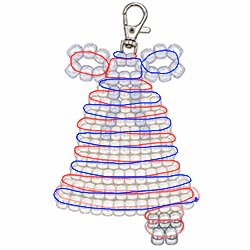
Free pony bead bell pattern diagram with step-by-step weaving instructions for a DIY bell ornament.

Other Ideas and Uses for This Project

Make a pair of earrings using this pattern substituting seed beads or E beads and a small gauge wire instead of the pony beads and cord.

One bell is pretty, but several together can make a lovely decoration. Try making a set in coordinating colors for a Christmas tree, hanging them at different heights in a window, or adding them to a wreath. You could even make a string of bells for a garland or decorate a gift basket with one that can be kept as a little remembrance.

For weddings, bridal showers and baby showers, the bells could be made in colors that match the celebration. They would look pretty hanging from a gift table, attached to favors or used as decorations around a guest book or centerpiece. A few different bead finishes can give the same pattern quite a different appearance.

Did You Know?

Bells have long been associated with celebrations and special occasions. Church bells have announced weddings and holidays for centuries, while small decorative bells became popular additions to Christmas decorations. Bells are also associated with good wishes and joyful occasions, which makes them a fitting decoration for weddings and showers as well as the holidays.

https://www.craftsupplydepot.com -  Section Divider

More Christmas Pony Bead Patterns

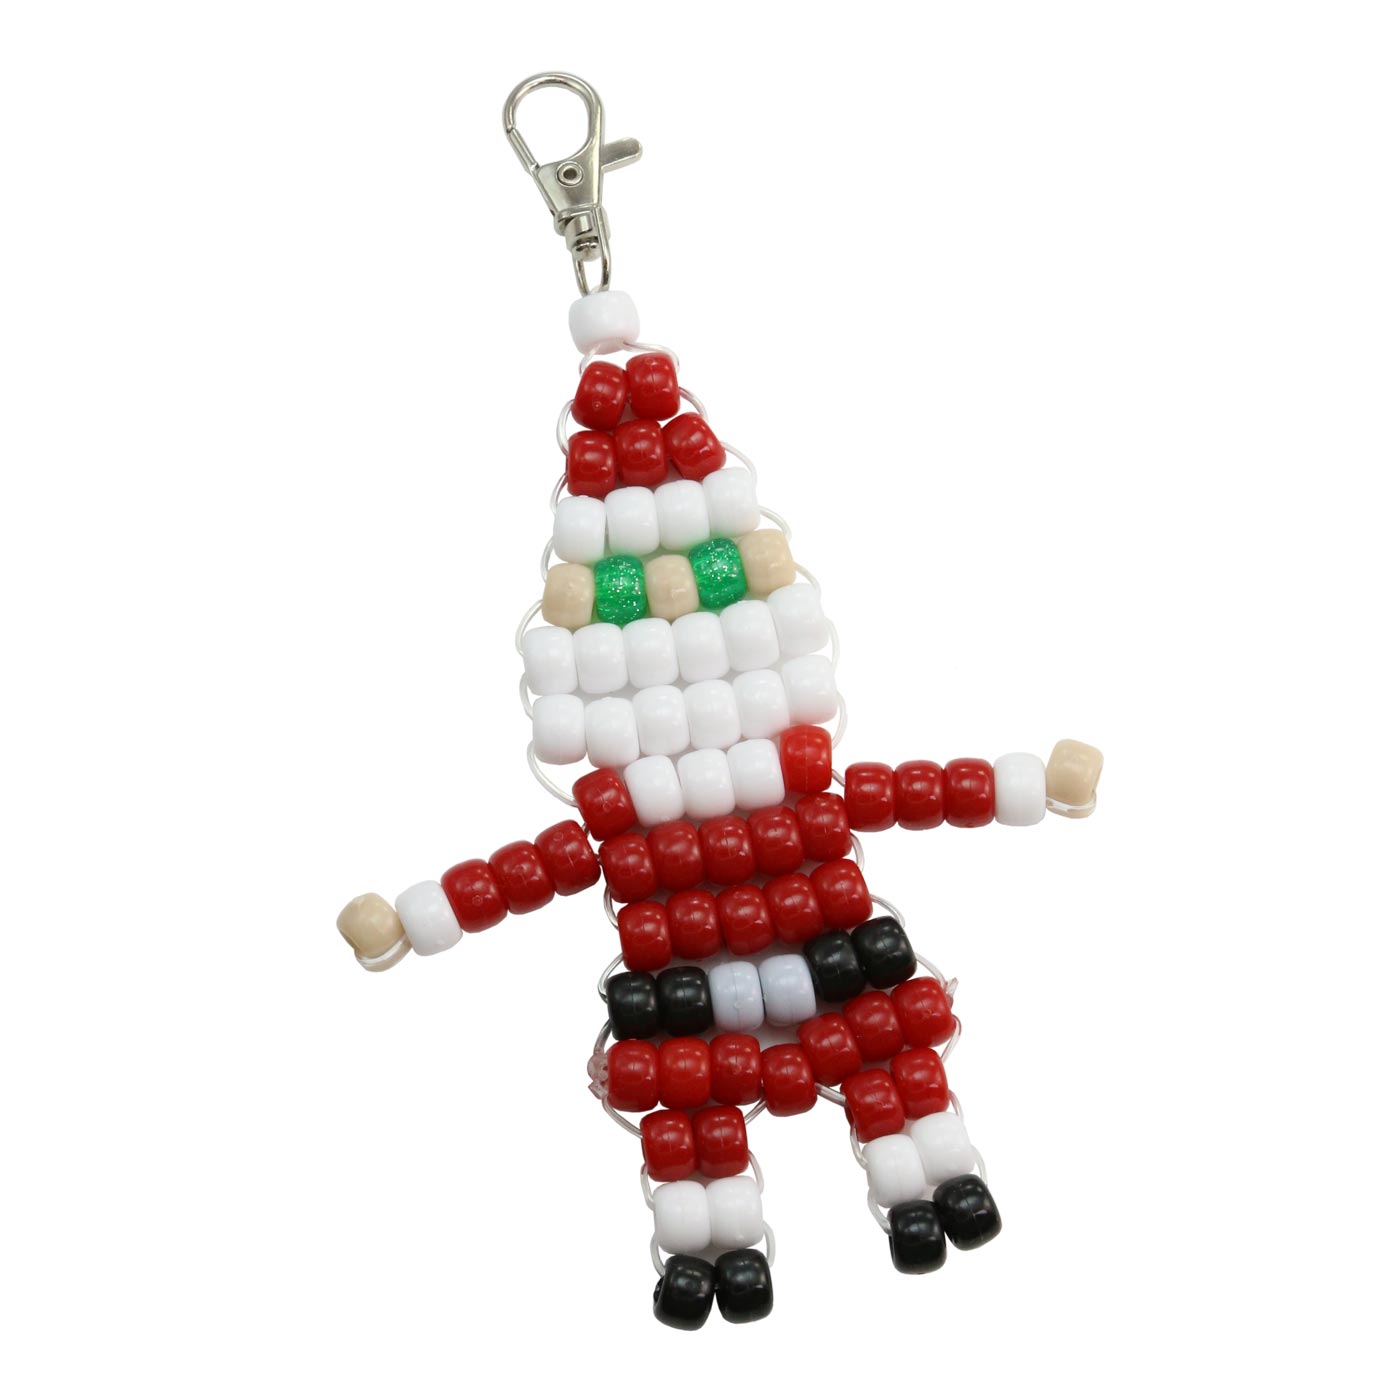
Looking for more Christmas pony bead projects? Here are more free patterns to make for ornaments, keychains and handmade Christmas decorations.

 
Return to Craft Instruction Menu
 
Please Read:
We realize that ads can be annoying at times but won't you please consider supporting this free pattern by reviewing the ads shown on this page and clicking on one that interests you. Any revenue generated helps pay for the costs of providing you with more patterns! Its a win, win situation for us all!
We sincerely thank you!


Pin It On Pinterest


Click to verify BBB accreditation and to see a BBB report.


© Copyright, 1994-2026, Craft Supply Depot, sister site to BJ's Craft Supplies, All rights reserved, Craft Supply Depot.   661 Abrameit Rd, Goliad, TX  77963.
Click our phone number to call us at (361) 645-3325          p0183